The Original Tutorial
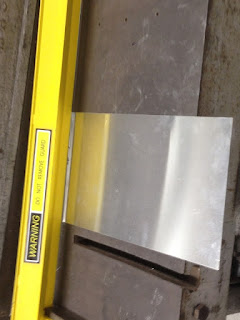
Making a bowl - Materials:a 1 mm aluminum sheet, a compass, a ruler, a tin sheet metal snip, a metal file, a nylon bossing mallet, a finishing hammer, a round leather sandbag, a mushroom steel dome dolly,
Step One:
Choosing the right thickness of the metal sheet - 1 mm thick aluminum.
As the different thickness of the metal sheet has different ductility, we should choose the appropriate thickness of aluminum due to the curvature of the shape.
Step Two:
Measuring the length of the bowl shape.
Drawing an appropriate shape on the metal sheet by marker.
Using the ruler and compass to draw the template on the aluminum sheet and cutting it out.
Tip:
Watching out and making sure there is not another foot under the machine.
Cleaning the edge that will prevent yourself when holding the metal sheet. Or wearing a pair of glove.
Step Three:
Beginning the general curve shape.
Using the curve side of the Nylon bossing mallet to hit the metal skin to get the rough curve trend that fit to the object with the sandbag.
Placing it over a round metal mound and softly hitting around it, rounded dome shape.
Marking the approximate shape on the metal sheet.
Following the marking line to shrink it.
Tip:
Following the topographic line to hit it that will get much more similar surface to the object.
The most difficult part is to get rid of metal folds, need to hit it around the circle and be patient on it.
Step Four:
Holding the metal above the spherical tool and hitting it slowly.
Using the a bit flatter and sharper side of the mallet hit skin on the metal mushroom dome dolly to get curve and smooth the surface.
Step Five:
Using the English wheel to smooth the surface.
Tip:
The English wheel is a better tool for a skilled craftsman for low-crown applications than manually hammering.
The Reflection
From the digital making course I learn a different way of representing shapes and forms, that relating to the architectural discipline. Throughout the making process of the sheet metal object I found the creation of the bowl to be a new approach to design innovation which can be used into my studies. In the way that i can create forms using sheet metal in my model.
The idea is that sheet metal is an easily influenced and adaptable material which encourages me to think outside when designing and creating architecture, such as dome roofs.
Learning new way to manipulate materials in create new found objects, which allows the shape to seams as a different element from the original source. Learning how to create objects out of sheet metal is a skill that I will be able to use to create models out of metal, as well as can be used in future architectural spaces.
For example, Cloud Gate is a public sculpture by Indian-born British artist Anish Kapoor.
This course provides me a opportunity to learn process a metal fabrication and polished. It is a challenge and learning. I satisfied what I have been produce. Overall it provide me different experience, it is a great learning skill, use different methods and tools to produce the interdisciplinary skin.


